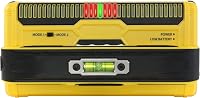
Stud Finder Sensor Types: Edge, Center and Multi-Sensor
Edge sensors locate a stud's sides, center sensors help identify its middle, and multi-sensor models show more of its width at once. Match the sensor style to your wall and confirm the mark before drilling.
On this page (8 sections)
- What are the main stud finder sensor types?
- Which sensor type should you choose?
- How do you use a stud finder to mark the center?
- Can a stud finder detect wires or pipes?
- Which stud finder type works on plaster and lath?
- What should you check before buying a stud finder?
- How do edge, center and multi-sensor finders compare?
- Frequently asked questions
Edge sensors signal a stud's side, center sensors help locate its middle, and multi-sensor models can show more of the stud's width in one pass. The right stud finder sensor type depends on the wall, the depth you need and how clearly you want to see the target.
For a basic drywall job, an edge finder can work if you scan from both directions and mark both sides. A center finder or multi-sensor display can make the center easier to identify, while visual scanners can show a broader picture on compatible walls.
What are the main stud finder sensor types?
The main types are edge sensing, center sensing and multi-sensor sensing. They differ in how they indicate a stud, not in whether every wall will produce a clean reading.
| Sensor type | What it indicates | Useful when |
|---|---|---|
| Edge | A stud boundary as you move across it | You can scan from both sides and mark each edge |
| Center | The likely middle of a stud | You want a direct center reading for mounting |
| Multi-sensor | A broader pattern across the stud's width | You want multiple indicators to help interpret the target |
| Visual wall scanner | An image or visual representation inside compatible walls | You want to see more than a simple beep or edge signal |
These labels describe common approaches, but models may combine features. Check the instructions for what its lights, screen or audio alerts mean.
How does an edge stud finder work?
An edge finder signals when it detects a change at a stud's boundary. Move it across the wall in one direction, mark the signal point, then scan from the other side to find the opposite edge.
The middle between those marks is a useful estimate of the stud center. A single edge reading does not identify the center by itself, so don't place a screw or anchor based on that one mark.
How does a center finder work?
A center finder indicates the stud's middle or helps you identify it from the sensor pattern. That can simplify mounting because you don't have to estimate the midpoint between two edge marks.
Read the display as the manufacturer describes. A center indicator is still a tool reading, so repeat the scan and check for a consistent result.
What does multi-sensor mean?
A multi-sensor finder uses several sensing elements to detect more of the stud at once. Some models display the stud's width and indicate its center, which can make the result easier to interpret than a single edge signal.
The sensor count alone doesn't tell you how a tool will perform on every wall. Look at its stated wall materials, detection depth and display, then follow its scanning directions.
Which sensor type should you choose?
Choose based on the wall material and the kind of feedback you can use confidently. A simple edge finder may suit a straightforward drywall job, while thicker or layered walls call for a model designed for deeper sensing.
A center or multi-sensor display can help with mounting tasks where you want a clearer center mark. If you need to locate other objects, such as metal or live wiring, choose a scanner with those specific modes and treat each result separately.
For basic drywall and picture hanging
An edge finder can be enough for a light mounting job in standard drywall. Find both edges, mark the midpoint, and verify the result with a second pass.
For a row of frames, first lay out the picture positions and then find framing where it can support the planned hardware. Our guide to hanging a straight picture wall with a laser level covers the layout step.
For a clearer center mark
A center-finding model is useful when you want to place a mount near the middle of a stud. The Zircon MultiScanner A250c locates wood and metal stud centers and edges, with StudScan up to 3/4 in deep and DeepScan up to 1 1/2 in.
The A250c also has a color display, audio alerts and a projected pointer. Its AC Scan is for live, unshielded AC wires within the stated range; it cannot prove that an area is clear of wiring.
For showing more of the stud width
A multi-sensor finder can help when a single boundary signal leaves you unsure about the target. The Franklin Sensors ProSensor M150 uses 9 sensors and displays the full width of studs, including double studs, with a center indicator.
The M150 detects wood and metal studs and includes live-wire detection. It requires 2 AAA batteries, which are not included.
For deeper scans through layered walls
For thicker or layered surfaces, compare the tool's stated depth and compatible materials before buying. The Franklin Sensors ProSensor MAX has 13 larger sensors and a maximum detection depth of 2.5 in, with two modes for standard drywall and deeper scanning.
Franklin Sensors says the MAX can scan through two or more layers of drywall, plaster, OSB, plywood, MDF and large tile. Its display shows stud width and centers, and it requires no calibration.
For a visual scan on compatible surfaces
A visual wall scanner may suit you if you want to see a representation of objects inside a wall. Walabot DIY 2 visually identifies stud centers and tracks pipes and wires, with a stated detection depth up to 4 in.
Walabot DIY 2 works with iOS and Android and connects to a phone through its own Wi-Fi. It is designed for drywall and plywood.
Walabot says not to use it on lath and plaster, concrete, tile, brick, metal-backed walls, stucco or concrete with furring strips.
How do you use a stud finder to mark the center?
To mark a likely center, scan slowly, make repeat passes and compare the results. Use the model's own instructions because calibration and signal patterns vary.
- Check the tool's approved wall materials and detection modes.
- Keep it flat against the wall and start where the instructions recommend.
- Move it slowly across the likely framing area.
- Mark each edge or center signal, depending on the sensor type.
- Scan back across the same area and approach from another direction.
- Confirm the mark before drilling, using other safe checks where suitable.
A stud finder can give inconsistent results if it is moved too quickly or not held as directed. If readings shift or span an unusually wide area, pause and scan a nearby section to compare.
For more about common sources of error, see what affects stud finder accuracy.
Can a stud finder detect wires or pipes?
Only some models include modes for wires or metal, and those modes have limits. A stud detection result does not identify every pipe or wire behind the surface.
The Zircon A250c includes Metal Scan and AC Scan, while the Franklin Sensors ProSensor M150 includes live-wire detection. Walabot DIY 2 can track pipes and wires on compatible drywall or plywood, but its wall restrictions still apply.
Never treat a negative reading as proof that drilling is safe. Learn more in do stud finders detect wires and pipes?.
Which stud finder type works on plaster and lath?
Choose a tool only if its instructions support the wall material you have. Plaster and lath can be harder to scan than standard drywall, and results can vary with wall layers and construction.
The ProSensor MAX says it scans plaster and other layered materials up to its stated depth. Walabot DIY 2 explicitly excludes lath and plaster, so don't use it for that wall type.
See our guide to stud finders for plaster and lath walls for more detail, or compare options in the best stud finder for plaster walls guide.
What should you check before buying a stud finder?
Check the wall materials, detection depth, display and extra detection modes. These details matter more than the sensor label alone.
- Wall compatibility: Confirm the surfaces named in the instructions match your wall.
- Depth: Compare the tool's stated detection depth with the wall layers you need to scan.
- Readout: Decide whether edge marks, a center signal, a width display or a visual scan is easiest for you to interpret.
- Other targets: Check for separate metal or live-wire modes if your job needs them.
- Power: Confirm the battery type and whether batteries are included.
- Repeatability: Look for clear instructions on calibration, starting position and scan speed.
If you're comparing choices for a particular wall surface, start with the best stud finders for different wall types.
How do edge, center and multi-sensor finders compare?
Edge finders can work well when you can mark both sides, while center and multi-sensor designs give more direct cues about the target's middle or width. A visual scanner adds another kind of feedback, but only on the surfaces it supports.
Pick an edge finder for simple scans where you can confirm both boundaries. Choose a center or multi-sensor model if you want a fuller stud display, and consider a visual scanner only when its wall compatibility matches your project.
For the safest choice, match the tool to the wall and verify every mark before drilling. If you need help choosing a model for your surface, use the stud finder guide for different wall types.
Frequently asked questions
What is the difference between an edge and center stud finder?
An edge finder signals when it reaches a stud's side, so scan from both directions and mark both edges to estimate the center. A center finder identifies the stud's middle more directly.
Either way, scan more than once and check that the mark makes sense before drilling.
Are multi-sensor stud finders more accurate?
More sensors can show a wider portion of a stud at once, but they don't remove the need for careful scanning. Wall layers, texture, moisture, nearby metal and user technique can affect readings.
Follow the device instructions and confirm the stud center with a second pass.
Do stud finders work through plaster and lath?
Some models are intended for thicker or layered walls, but compatibility varies. Check the device's stated wall materials and depth, then scan slowly in more than one direction.
For plaster and lath guidance, see our stud finder guide for plaster and lath walls.
Can a stud finder detect wires behind a wall?
Some scanners include a live-wire detection mode, but that feature cannot guarantee a wall is safe to drill. Wiring may be shielded, outside the detection path or beyond the tool's range.
Turn off power where appropriate and use caution before making a hole.
Frequently asked questions
What is the difference between an edge and center stud finder?
An edge finder signals when it reaches a stud's side, so scan from both directions and mark both edges to estimate the center. A center finder identifies the stud's middle more directly.
Either way, scan more than once and check that the mark makes sense before drilling.
Are multi-sensor stud finders more accurate?
More sensors can show a wider portion of a stud at once, but they don't remove the need for careful scanning. Wall layers, texture, moisture, nearby metal and user technique can affect readings.
Follow the device instructions and confirm the stud center with a second pass.
Do stud finders work through plaster and lath?
Some models are intended for thicker or layered walls, but compatibility varies. Check the device's stated wall materials and depth, then scan slowly in more than one direction.
For plaster and lath guidance, see our stud finder guide for plaster and lath walls.
Can a stud finder detect wires behind a wall?
Some scanners include a live-wire detection mode, but that feature cannot guarantee a wall is safe to drill. Wiring may be shielded, outside the detection path or beyond the tool's range.
Turn off power where appropriate and use caution before making a hole.