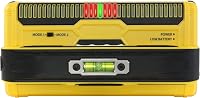
Are Stud Finders Accurate? What Affects the Reading
Stud finders can locate studs accurately when used on a suitable wall and scanned as directed. Wall layers, moisture, nearby metal, and how you move the tool can affect the reading, so confirm the center before drilling.
On this page (8 sections)
- How accurate are stud finders?
- What can affect a stud finder's reading?
- How should you scan to get a more reliable result?
- Why does a stud finder show a stud where there isn't one?
- Can wall type make a stud finder less accurate?
- How do you confirm the stud center before drilling?
- Are stud finders accurate enough for mounting shelves or a TV?
- What should you do when readings keep changing?
Stud finders can locate studs accurately when the wall and scanning method suit the tool. Wall layers, moisture, nearby metal, battery condition, and how you move the scanner can all change the reading, so confirm the center before drilling.
A single beep or light is a clue, not proof. Scan slowly in both directions, check whether the marks repeat, and account for the wall material.
How accurate are stud finders?
A stud finder is most useful for locating a likely stud area and its edges or center. Its accuracy depends on the sensor, wall surface, target depth, and how consistently you scan.
Electronic models sense changes behind the wall. Some show an edge, while others display the full width of a stud.
Magnetic finders locate metal fasteners, which can help trace a stud line, but a screw or nail isn't the same as a confirmed stud center.
The types of stud finder sensors explains what edge, center, and multi-sensor models indicate. Use the result as a starting point, then confirm it with repeated scans.
What can affect a stud finder's reading?
Wall conditions and scanning technique are the main reasons readings vary. A scanner that works on plain drywall may behave differently across thick plaster, tile, or several layers of material.
Common factors include:
- Wall thickness and layers: Deep finishes can make the target harder to detect.
- Surface texture: Uneven plaster, bumps, and seams can disrupt steady contact.
- Moisture: Damp materials may change the signal on some electronic models.
- Metal: Fasteners, corner bead, pipes, or other metal can create a target.
- Wiring: Live wiring may trigger a separate warning or affect some scans.
- Movement: Tilting, lifting, or moving too fast can make marks inconsistent.
- Power: Low batteries can lead to weak or erratic signals.
When a reading changes from one pass to the next, check these conditions before deciding there is no stud. The guide to stud finders on plaster and lath walls covers why older wall construction can be harder to scan.
How should you scan to get a more reliable result?
Follow the model's instructions, keep it flat against the wall, and move it slowly. Many tools need a clear starting area or a specific calibration step; others are designed to start over a stud.
- Check the manual for the correct mode and starting procedure.
- Make sure the battery is fresh enough for reliable operation.
- Place the scanner flat against the wall.
- Move it slowly across the area and mark the indicated edge or center.
- Scan back from the opposite direction and mark the second edge.
- Repeat at another height and compare the marks.
If the tool calls for calibration, use a clear patch away from a likely stud. Don't assume every model uses the same calibration method.
For additional context on nearby hazards, read whether stud finders detect wires and pipes. A wire warning does not identify every pipe or wire in a wall, so use caution before drilling.
Which stud finder features can help with repeat scans?
A wider sensor array or a clear display can make the target easier to interpret, though no feature removes the need to scan carefully. Match the tool to your wall and the depth you need.
The Franklin Sensors ProSensor MAX has 13 sensors, two detection modes, and a display that indicates stud width and center. Its deep scan mode is intended for thicker or tougher walls.
The Franklin Sensors ProSensor M210 also has 13 sensors and shows the full stud width, with a center indicator. It includes live wire detection and does not require calibration, according to Franklin Sensors.
Use either model according to its manual, and confirm the reading with a second scan. For other wall types, compare the options in our best stud finder for plaster walls guide.
Why does a stud finder show a stud where there isn't one?
A false or unexpected reading can come from material behind the wall, not just a wood stud. Metal, wiring, thick joints, or a change in surface depth can resemble a target to some scanners.
Scan the same area from another direction and at a nearby height. If the signal appears only at one small point, it may be a fastener or another object rather than the center of a continuous stud.
Some scanners have metal or live-wire modes that help separate targets. The Zircon MultiScanner A250c has modes for studs, metal, and AC wiring, plus a display that changes color by mode.
Its AC Scan detects live, unshielded AC wires within its stated depth, and Zircon advises turning off power before drilling. Follow the device instructions and don't treat a stud finder as a guarantee that an area is clear.
If your main question is wire detection, see do stud finders detect wires and pipes?.
Can wall type make a stud finder less accurate?
Yes, wall material can change how well a scanner detects a stud. Plain drywall is often simpler to scan than plaster and lath, tile, or multiple layers, because the sensor must read through more material or an uneven surface.
On plaster, move slowly and repeat the scan at several heights. If the tool has a deep scan mode, use it only as its instructions allow; a deeper mode does not guarantee a clear result.
The Franklin Sensors ProSensor M150 has 9 sensors, an always-on deep scan mode, and live-wire detection. Franklin Sensors says it detects wood and metal studs up to 1.5 in deep.
For lath and plaster, verify the target with more than one method before choosing a drilling point. The plaster wall stud finder guide has more steps for that surface.
How do you confirm the stud center before drilling?
Mark both detected edges and use the midpoint as the estimated center. Repeat at a second height; a stud should usually produce a consistent vertical line rather than a lone isolated mark.
You can also check for a nearby outlet or switch, since electrical boxes are often mounted beside a stud. This is only a clue, not a reliable measurement.
Before drilling, look for warning indicators and consider what could be behind the wall. A scanner may not detect every wire or pipe, especially if it is outside the device's sensing limits or shielded.
Are stud finders accurate enough for mounting shelves or a TV?
They can help you find a suitable mounting point, but confirm the target and follow the mount's instructions. Check that the bracket's holes align with the stud positions you marked.
For a heavy load, don't rely on one quick scan or a single marked point. Confirm each stud location required by the mount, and use fasteners suited to the wall and load.
If readings don't repeat, scan another section or use a second method to verify the location. Stop if you get a wire warning or have a reason to suspect plumbing or electrical lines at the drilling point.
What should you do when readings keep changing?
Reset the scan, check the battery and wall surface, then repeat the passes slowly. Move to a nearby clear area if the manual calls for calibration, and avoid scanning over seams or obvious metal trim.
Try another height and compare the edge marks. If the same center does not appear on repeated passes, treat the result as uncertain and don't drill based on it alone.
For most readers asking whether stud finders are accurate, the practical answer is yes, when the reading repeats and the wall suits the tool. Use repeated edge scans for a center estimate, and check wiring or plumbing concerns before making a hole.
Read stud finder sensor types to choose a scanning approach, or see whether stud finders detect wires and pipes before drilling near a warning.
Frequently asked questions
Are electronic stud finders accurate?
Electronic stud finders can locate stud edges or centers, but accuracy depends on the wall, the tool's instructions, and a steady scan. Thick finishes, multiple wall layers, nearby metal, or moisture can affect a reading.
Scan from more than one direction and confirm the center before drilling.
Why does my stud finder give false readings?
A stud finder may react to thick or uneven wall materials, moisture, metal, wiring, or a change in scanning pressure. Some models also need calibration on a clear area.
Check the manual, use fresh batteries, and scan slowly in both directions to see whether the same target appears.
Should I calibrate a stud finder every time?
Follow the tool's instructions because calibration steps vary. Some models require calibration against a clear section of wall, while others are designed to start scanning without calibration.
If readings seem inconsistent, move to another spot, check the battery, and restart as the manual directs.
How can I confirm a stud finder reading?
Scan horizontally from both sides and mark each detected edge; the midpoint is the estimated stud center. Repeat the scan at another height to check that the marks line up.
Before drilling, consider nearby outlets, switches, plumbing, or wiring, and use a small pilot hole only when appropriate.